This tutorial will take you through the process of making a set of glasses similar to those at the top of the page and show you a few simple variations. You will need the Blade Pro plug-in for Photoshop and Paint Shop Pro which is available from Flaming Pear as a limited time trial shareware program. You will also need to download and install my Polyurethane and White Pearl presets for Blade Pro.
Open a new image 500x500 pixels with a white background and add a new raster layer.
Decide on your lens shape. You can use the shapes available with the shapes tool, deform a standard shape (either by doing it as a vector object or with filters) or free hand a shape with the drawing tool of your choice. Whichever you choose turn the anti-aliasing off. To keep this simple I'm going to use a basic ellipse.
Set your foreground color to your base lens color. For clear lenses choose a pale grey color, for colored lenses pick the color of the tint.
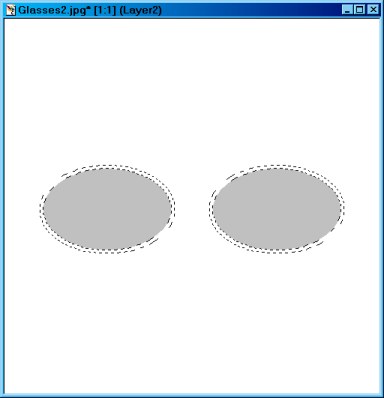
Draw your shape to one side of the center of the image like this (image is reduced in size for faster loading):

Use the selection tool of your choice and select the shape. Move it while keeping an eye on the coordinates at the bottom left of the PSP window. You want to place the shape at a Y coordinate (second number in the first pair of coordinates) that you will remember so you can set the other lens at the same level. I used 200. After placing the lens, copy it and deselect it.
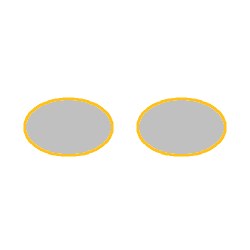
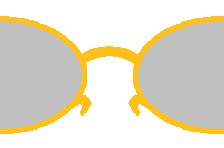
Paste the next lens in the same layer (ctrl-e). Mirror the shape (make sure the 'apply to all layers' box is NOT checked) so the glasses will be balanced if you used a nonstandard shape and place it at the same Y coordinate with a space that looks good for the bridge of the glasses between them. You should have an image something like this:

Add a new raster layer.
Now we'll construct the frame around the lenses. Decide what style of frame you want to make. For the glasses at the top of the page I made bits of hardware to hold the lenses together but not enclosing the lenses. These are both the easiest and the hardest frames to make. They look nice but you have to be very careful in placing the bits. For this tutorial I'll do wire rimed frames which are easier to describe in text.
Set your foreground color to some shade that contrasts with what you have in the image already, you can always change it in a later step. I use <255,192,23> for a color that suggests gold.
On your lens layer use the magic wand tool to select one lens. Hold down the shift key and select the other lens. Both lenses should be selected.
Go to Selections, select Modify, Expand, and choose some number of pixels to be the width of your frame. This is largely a matter of taste so start with 5 pixels and if you don't like it use ctrl-z to undo the Expand and try something thicker or thinner to suit your taste. I do not recommend anything thinner than about 5 pixels, remember we have to apply BladePro to this later!
Now hold down the control (ctrl) key and select each lens again with the wand. You should now have a rim around each lens selected like this:
Go up to the empty layer over the lenses. Fill in your selections with either a flood fill or some swipes of the airbrush or pen and deselect the rims:
Now to add in a bridge and the hinges for the bows to attach to.
Select the line tool and set it to straight line, on the middle tab of the tool palette choose rounded ends. For the width you generally want something at least as wide as your rims, most of the time twice as wide looks better.
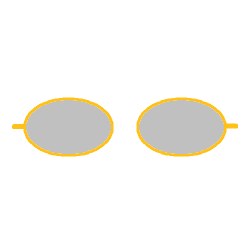
Find a point on the outside of one lens where a bow would logically attach, Note the Y coordinate and draw a short line horizontally out from the lens. Keep an eye on the coordinates. The first pair will give you the Y you need to remember. You can ignore the second set. The third set will let you know how long the line is with the X coordinate and you want to keep the Y equal to 0 for a straight line.
Do the same on the other side of the other lens, making sure the line is at the same level as the first and is the same length. Now you should have this:
For the bridge you can either use a straight line or a slightly curved one. I'll do a curved one.
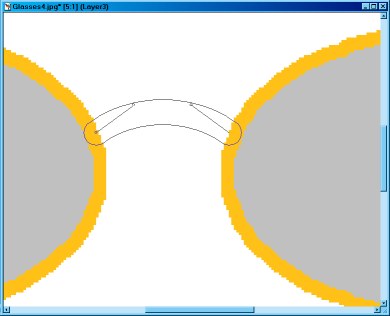
Change your line tool to bezier and decide where to put your bridge. Again, you'll have to watch you Y coordinates, we want the line to be level at the ends. Click on one rim and drag to the same level on the other. You should have a outlined line, click on it (and hold the button down) and two handles appear on it. Rotate the handles up until you get a bridge shape you like:
Now if you are making anything but metal rim glasses you are done and can skip down to the bows. If you are making metal frames you need to do the nose pads. Since you want these to be mirror images of each other you might want to do them as vectors (then covert the layer to raster and merge it with the rest of the frame layer) or do them off the frame and then move them onto the frame. Either way you make one then copy and mirror it for the other.
Somewhere on your frame layer but not touching the frame draw a shape like this with the bezier line tool:
Thin the ends a bit and copy the shape. Mirror the copy and place the two at the same level on the rims:
Now go back the the layer with the lenses to add the pads to the nose pieces.
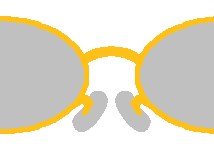
Use the bezier tool set to about 20 and a pale grey color to make a gentle kidney shape for the pad. Copy and mirror it and place the pads under the supports on the frame:
Now for the last two pieces, the bows. Place a new raster layer above the frame (we'll move it later).
Set your line tool back to the width you used for your hinge and back to a straight line. Starting at the outside end of the hinge, draw a line out to about the midpoint of the opposite lens and either above or below the lens itself for the best look:

Now to decide the shape of the end of the bow. Commonly it just angles down slightly and thickens a bit at the end but another style is a half moon shape that curls around the ear. I'm going to do the more common style, for the half moon just use the bezier line to make a half moon at the end of the bow.
Change to the bezier line tool and make a line from the end of the bow down at a gentle angle and give it a nice curve where it joins the bow:

Using the pen just thicken the end of the bow so it ends in a tear drop.
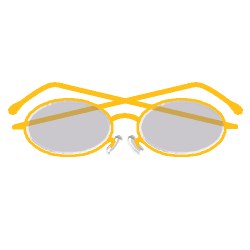
Move the layer under the lens layer, duplicate the layer and mirror it, reposition the bow to join the hinge on the other side and you have something like this:

Okay, now you have an image with five layers, a blank white one at the bottom, then one bow, the other bow, the lenses and pads, and the frame. Now to keep these from being messed up after all this work duplicate each layer and lock the transparency on the originals. Turn off the visibility of the originals and work on the copies.
Lets start with the lenses. Go to the lens layer and select both lenses.
Go to Image, Plug-in Filters, Flaming Pear, Blade Pro. Load the teph_polyurethane preset and adjust the radius down to about 2 for frames like these, 5 for frames like the ones at the top of the page. Change the shape of the bevel to a flat side (the top selection) and apply.
Select the nose pads and go back into Blade Pro. Select teph_whitepearl, you may want to change the lighting colors to grey by changing the saturation to 0 and the same with the tarnish, don't change anything else, just the saturation on the colors.
Now the image looks like this (keep the nose pads selected):

So far it doesn't look like much, I know. Here's where things come to life.
Keep the nose pads selected, turn off all layers other than the lens layer. Make sure the lens layer is active and go to Masks, New from Image, make sure the 'invert mask data' box is checked, and click OK.
With nose pads STILL selected, go to Colors, Adjust, Brightness and Contrast. Set brightness to -75 and contrast to 75% and click OK. The nose pads should now be more noticeable and you can deselect them:
Now the tricky parts are done. Go to each layer of the eyeglass frames and apply the Blade Pro preset of your choice. I'm using the Gold, Basic that came with Blade Pro.
To finish it off nicely each layer should have a drop shadow added. I use a dark grey, opacity 100, blur 20, offsets both at 5. To make the drop shadow for the lens layer (which is a mask) select the areas on the *original* lens layer that you saved and make a new layer under the mask lens layer. Apply the drop shadow to the new blank layer under the mask layer.
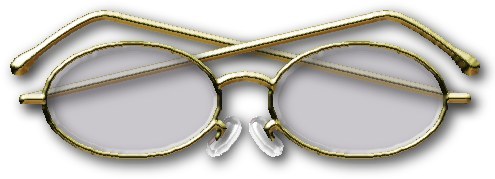
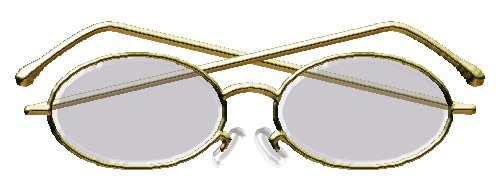
And there you have it, glasses!
Some ideas for your glasses:
- Delete the white background and merge all layers to make a tube
- Use Colors > Colorize on the lens mask layer to tint your lenses
- Make a transparent .gif for your guestbook page
- Add a designer signature to one lens. Place your name or icon on a layer above all the others and arrange it on the lens. Set the layer blend mode to something that looks good (try soft light or overlay)
Geen opmerkingen:
Een reactie posten